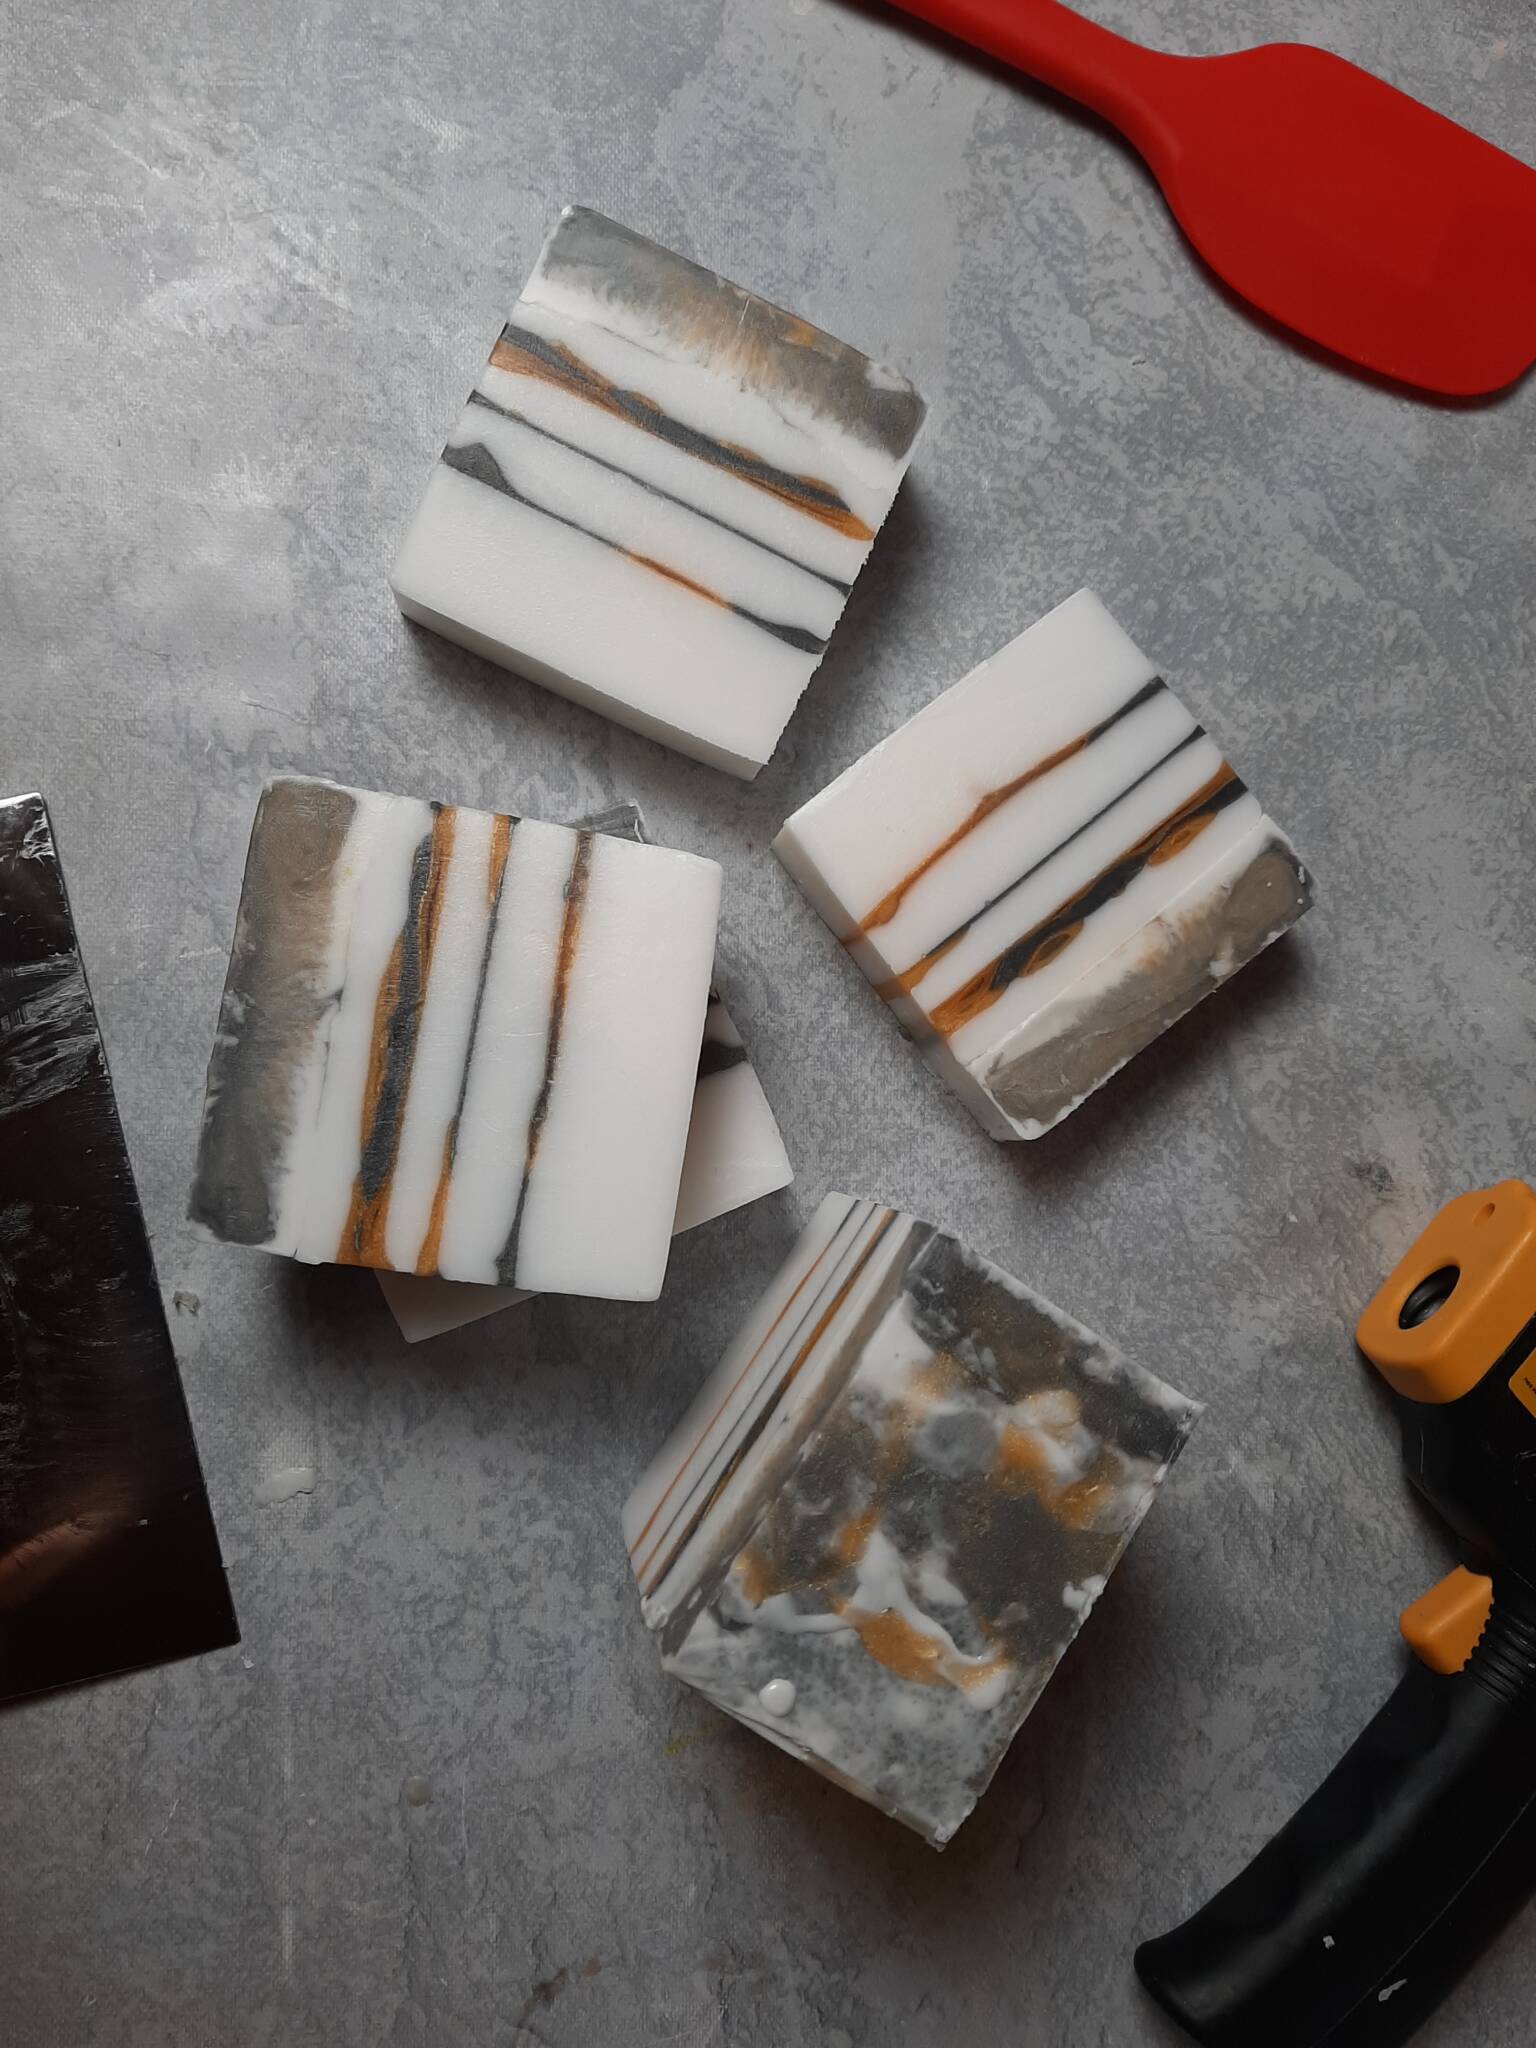
Making layers in a melt and pour soap makes a great looking and colorful bar of soap. However the layers can separate either when you unmold the soap or while using the soap in the shower. There are a few things to prevent your melt and pour soap separating.
There are two main tips to remember to avoid your melt and pour soap separating at the layers, monitor your soap temperature and use rubbing alcohol before pouring the next layer.
Monitoring temperature to avoid melt and pour soap separating.
Temperature of melt and pour soap is crucial to its melting and cooling. Monitoring the temperature to ensure it has the right heat or lack there of is crucial to the layer technique.
Melt and pour soap melting point varies from one manufacture to the other however the general rule for them is that between 120-125°F is the point that it begins to melt.
Another rule of temperature for melt and pour soap is that it has a point where it begins to burn if the heat is too hot. This temperature falls between 140-150°F.
Knowing these temperatures can help you with many techniques including making layers.
How to make layered melt and pour soap? Temperature monitoring
There is no exact science behind making layered melt and pour soap. It depends on the brand of melt and pour soap, the ingredients such as goats milk vs aloe vera soap, the size of the mold and of course the ambient temperature of the room.
The temperature of your first layer pour does not matter as long as its not burnt, but as it cools down you will want to monitor it before adding the second layer.
At Bahamas Candle and Soap we use two types of melt and pour soap, the SFIC and Stephenson brands of melt and pour soap. They do act differently hence its good to know which brand you are using.
We have found that the Stephenson tends to melt faster however the SFIC tends to remain liquid longer or cools slower.
Monitor your first layer to ensure it begins to form a skin. Use a infrared thermometer to keep track of the temperature of the first layer of soap. Once it begins to lower to 120°F the skin will begin to form but it is far from being able to hold another layer.
If you pour to soon the hotter top layer will break through the thin skin and you wont have layers but a swirl.
Let the temperature reduce to about 110°F where the skin has formed and the consistency of the soap is like a thick jello. This is where the next layer is ready to be poured.
Be carful at this temperature because if the temperature gets too low, closer to the the ambient temperature the soap will definitely be harder and can take another layer however it may be too cool and will not bind to the top layer. More on this in a moment.
What should be the temperature of top layers and when to pour?
Once the lower layer has cooled, formed a skin, is the consistency of thick jello and about 110°F it is a good time to prepare to pour your second or next top layer.
While the lower layer was cooling its also a good practice to keep an eye on the rest of your soap to ensure it stays liquid.
This is not absolutely necessary as if it does cool down you can re heat it to bring it up to a liquid state again. The reason to monitor the un-poured soap is that as it cools it tends to stick more to your container and you loose some soap to the edges.
Also when it cools the skin that forms on the soap sometimes will not melt completely and you have a blob in your soap when you pour. This happens with some brands but not all.
Once the bottom layer is hard and you have the next layer back up to about 125°F you are ready to pour your next layer but before you pour YOU MUST USE RUBBING ALCOHOL between the layers. Read below on the use of alcohol.
When and how to use rubbing alcohol to avoid melt and pour soap separating.
Isopropyl Alcohol or rubbing alcohol is the secret tool used in making layers in melt and pour soap.
The best kind of rubbing alcohol is the 99% rubbing alcohol. Its often labeled as specialty alcohol but it can be found in most pharmacies.
The typical 70% rubbing alcohol can also be used however the 99% tends to evaporate faster hence forming a better seal between layers.
Using isopropyl alcohol to make melt and pour layers.
Adding the right amount of alcohol is also crucial. Too much and the soap may separate when you cut it or when in use.
Too little and the bond will not be met between the top and bottom layer of melt and pour soap. This is where trial and error using your brand of soap will come into play along with the percentage of rubbing alcohol.
It has been the experience of Bahamas Candle and Soap using the SFIC brand and the 99% rubbing alcohol that a small amount from a mist sprayer works best while a wide wetter spray of one or two sprits with a wave of the hand while using the 70% works best.
Either way the layer of alcohol should be fine and thin but also cover the entire bottom layer of soap.
Now you are ready to pour your next layer of soap on top of the semi hard alcohol covered bottom layer.
The heat from the 95-110°F lower layer and the heat from the newly poured top layer at about 125-130°F will cause the alcohol to evaporate quickly while pulling the soaps into each other binding them together.
This is why the lower level can not be too cool. If it cools too much there will not be enough heat to melt the top skin into the newly poured soap and bind with a strong hold.
The alcohol helps this bond as it evaporates, hence why the 99% works best but is harder to calculate how much to use.
Melt and pour soap solidification temperature.
The solidification temperature of your particular melt and pour will slightly differ from another brand but the general rule for melting and solidification are about the same for all soap bases.
Just as there are a number of melt and pour soap bases the temperature to melt and solidify will vary by a few degrees.
Its good to melt your soap slowly and keep an eye on the temperature as it begins to melt. This will give you the melting point for your soap however its usually about 5°F difference between the melting point and the beginning of the solidification point.
120°F is the magic number to remember as over 120 the soap will begin to melt while under 120 the soap will begin to solidify by forming a thin skin layer on top of the melted soap.
While you are working with your first layer also keep an eye on the remaining soap to ensure it does not get to cool and begin to harden. Not that this is a problem its just that you maybe watching the first layer cool and forget that the second layer has cooled as well.
Test your melt and pour soap brand.
It was mentioned before that each soap base slightly differs by brand and by additives hence its a good idea to test a small batch and keep records of the results.
- How fast does it melt?
- What is its melting temperature?
- What is it solidifying temperature?
- Does it sweat easily?
- What size chunks work best to melt more evenly.
- How well does it perform?
- etc…
Learning more about your particular brand and type of melt and pour soap will make it easier to carry out more advanced techniques in soap making and makes it easier for you to work.
Keep these tips in mind when working on layers for melt and pour soap.
- Melting Temperature
- Solidifying temperature
- Temperature and feel of the lower layer before pouring
- Temperature of the top layer before pouring
- What amount of alcohol to sprits between the layers.
Melt and pour soap is relatively easy to work with but there are issues and soap problems that can come up and its best to know them and avoid as best as you can.